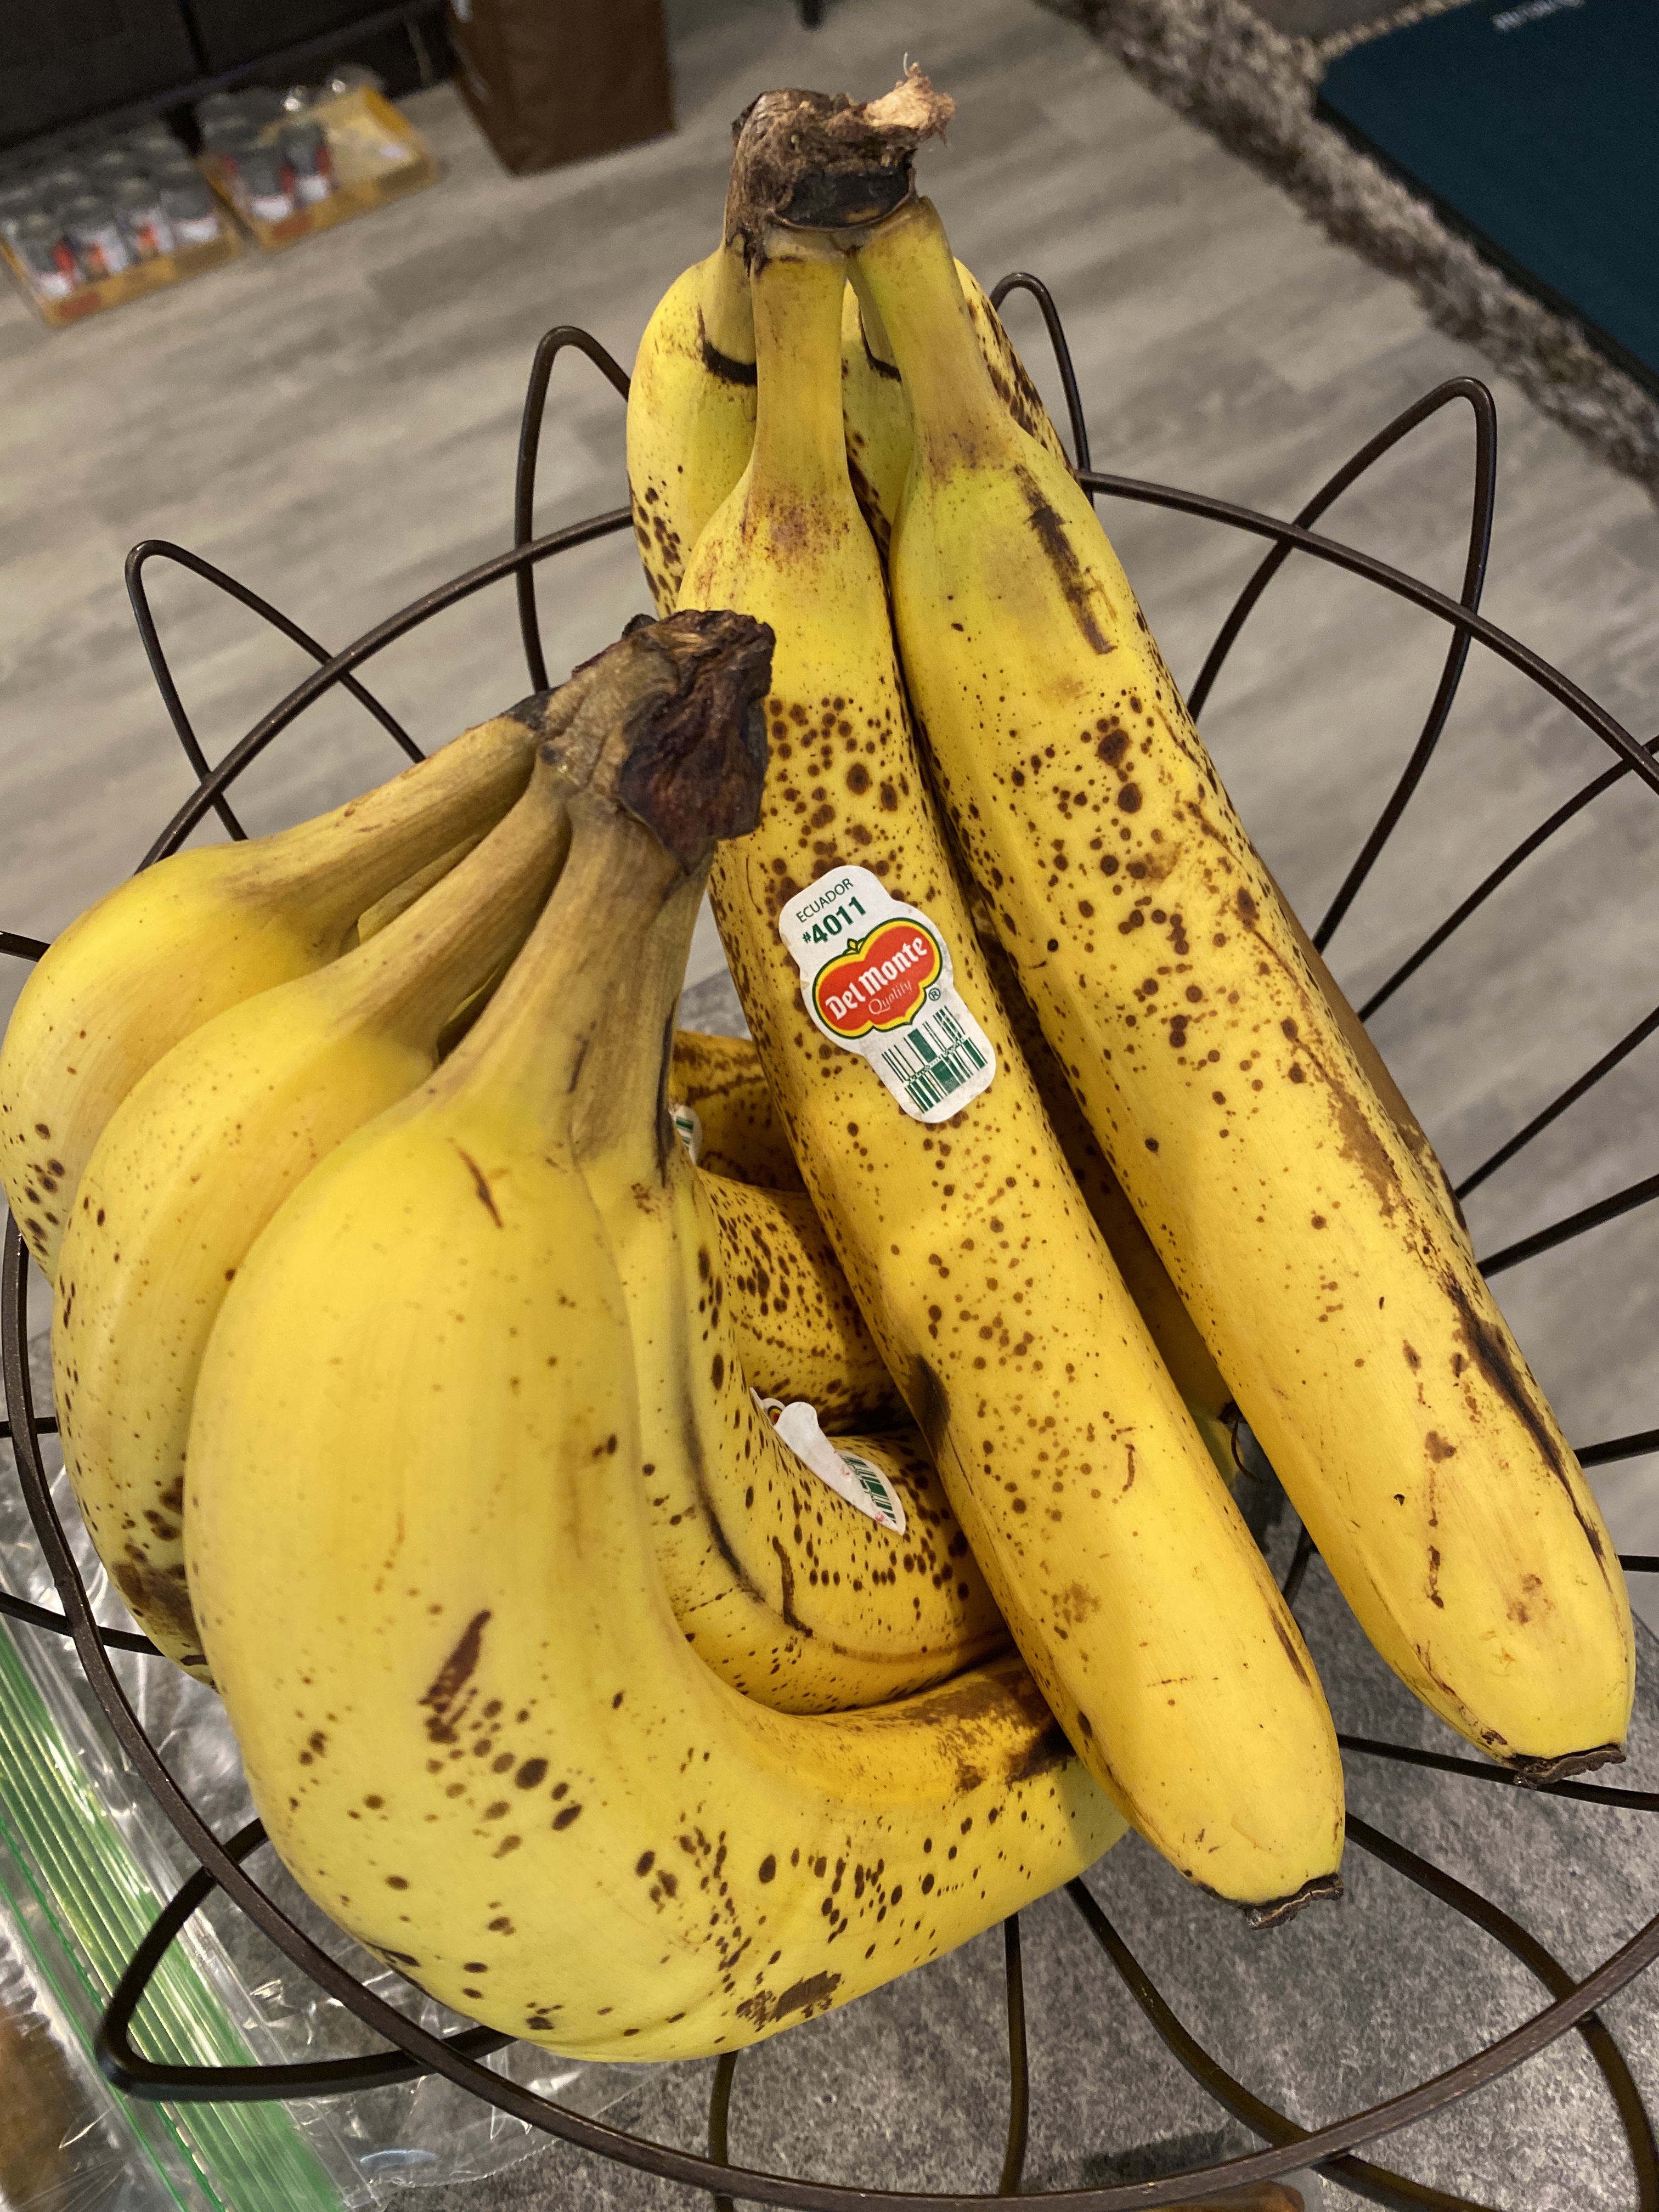
My mom would bake for our family growing up and always made some scrumptious, delicious desserts! The banana bread was always so soft and tasty — didn’t look hard to make. I decided to finally put it to the test. I took three different banana bread recipes and modified them to fit in mini muffin trays!
Ingredients:
FOR THE WET MIX:
3 ripe/very rip bananas, peeled
1/4 cup melted butter, unsalted or salted
1/2 cup brown sugar (3/4 cup if you want more sweet)
1 large egg, beaten
1 teaspoon vanilla extract
FOR THE FLOUR AND CHOCOLATE PORTION:
1 1/2 cups of all-purpose flour
1 teaspoon baking soda
Pinch of salt
Instructions:
FOR THE MUFFINS:
Preheat over to 350 degrees
Coat muffin tray with non-stick spray or paper liners
In a large mixing bowl, mash bananas with a fork until as smooth as you can get it and almost no lumps
In another bowl, mix together the flour, baking soda and salt
In the bowl of mashed bananas, mix in the sugar, egg and 4 Tbsp melted butter with a spatula (or all if you prefer – I used the remaining to top off the muffins at the end)
Fold in the flour mixture to the banana mixture until it is all smooth and combined well
Pour final mixture into muffin tray evenly
Bake muffins for 10 – 15 minutes (for mini muffins) or 25 – 30 minutes (for larger muffins)
With a toothpick, check to see if it comes out clean from the center — then it’s ready
Let it rest for 5 minutes then enjoy!
Tips/Notes:
If you don’t intend to eat the banana bread muffins right away, then after it cools for five minutes, wrap it in saran-wrap (clear plastic wrap) or an air-tight container and store for a week.
Place in the fridge if you wish to keep it for more than a week (lasts possibly another few days)
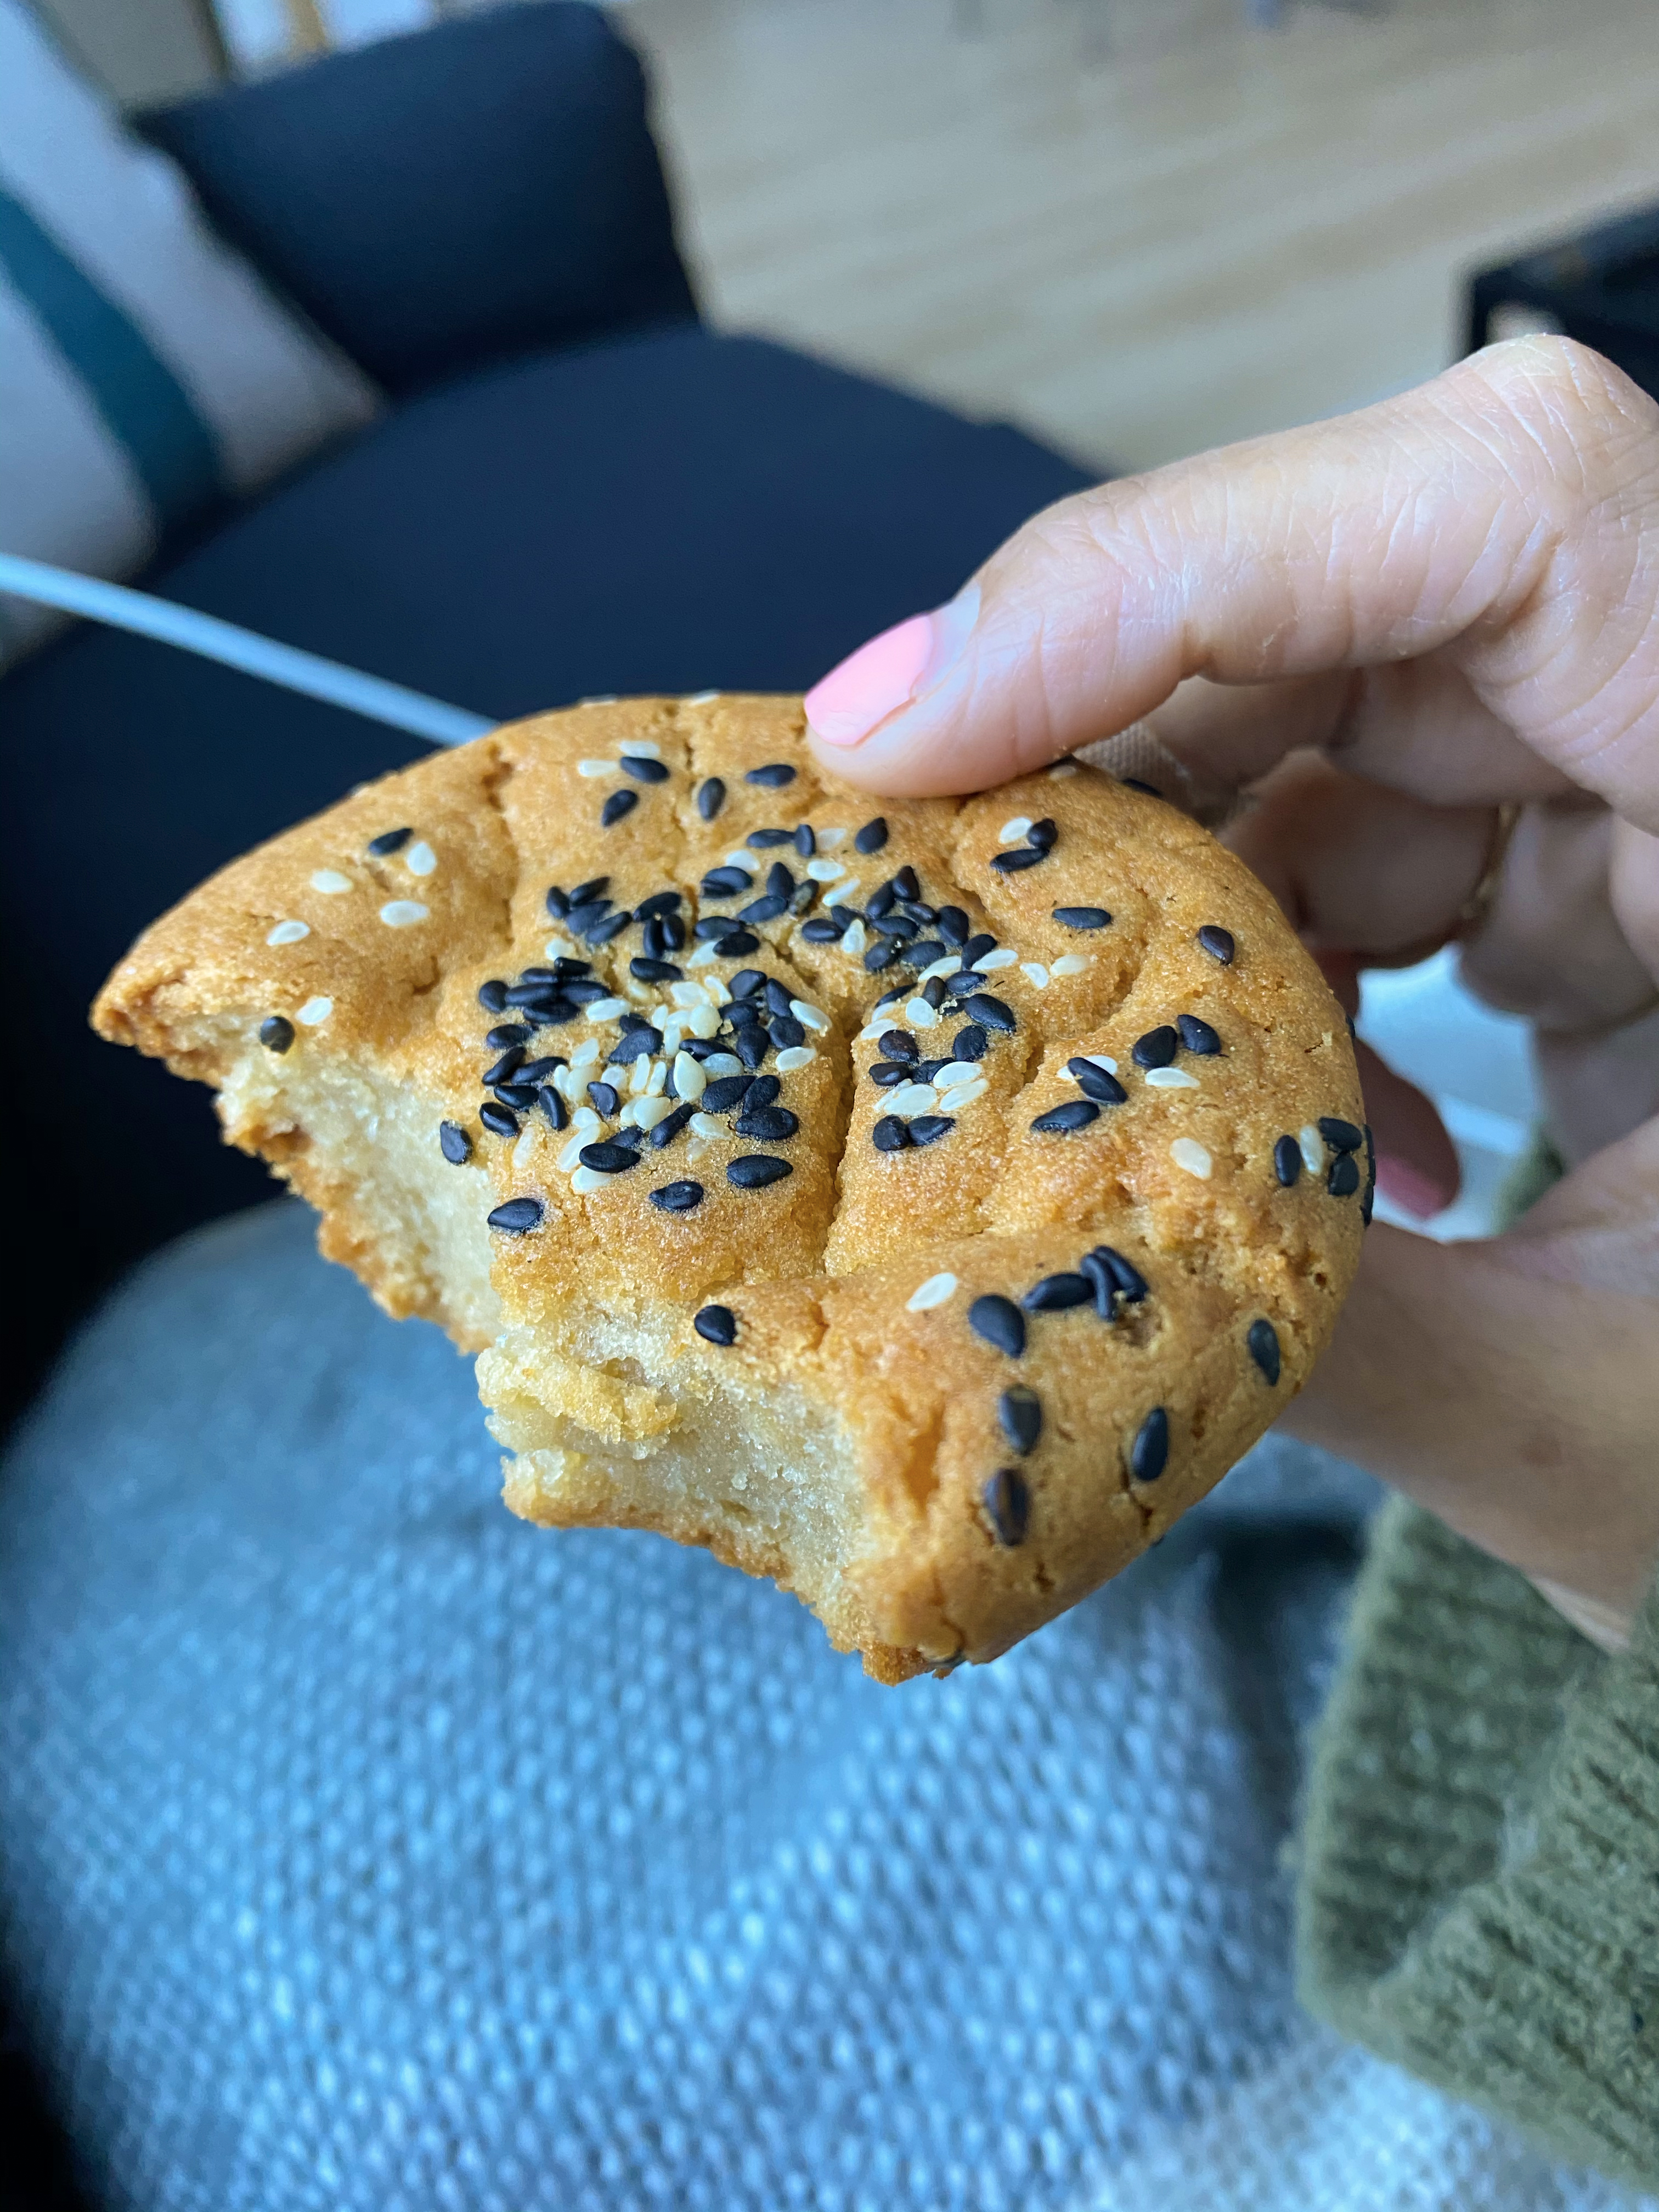
I’m not a baker but occasionally I indulge! This recipe was discovered by a friend who made a batch and shared the wealth – the result – Money! Thanks to my friend, I was able to enjoy these buttery, delicious, chewy muffins that aren’t too sweet!
1/4 cup (2 ounces) unsalted butter, melted and cooled (plus more for greasing pans)
1 13.5-13.66-ounce can full-fat coconut milk (see note)
2 large eggs, room temperature
1½ teaspoons vanilla extract
1 teaspoon molasses (optional, added for flavor)
FOR THE DRY MIX:
2 cups (320 grams) mochiko sweet rice flour
1 cup (200 grams) organic dark brown sugar*
2 teaspoons baking powder
1/2 teaspoon kosher salt
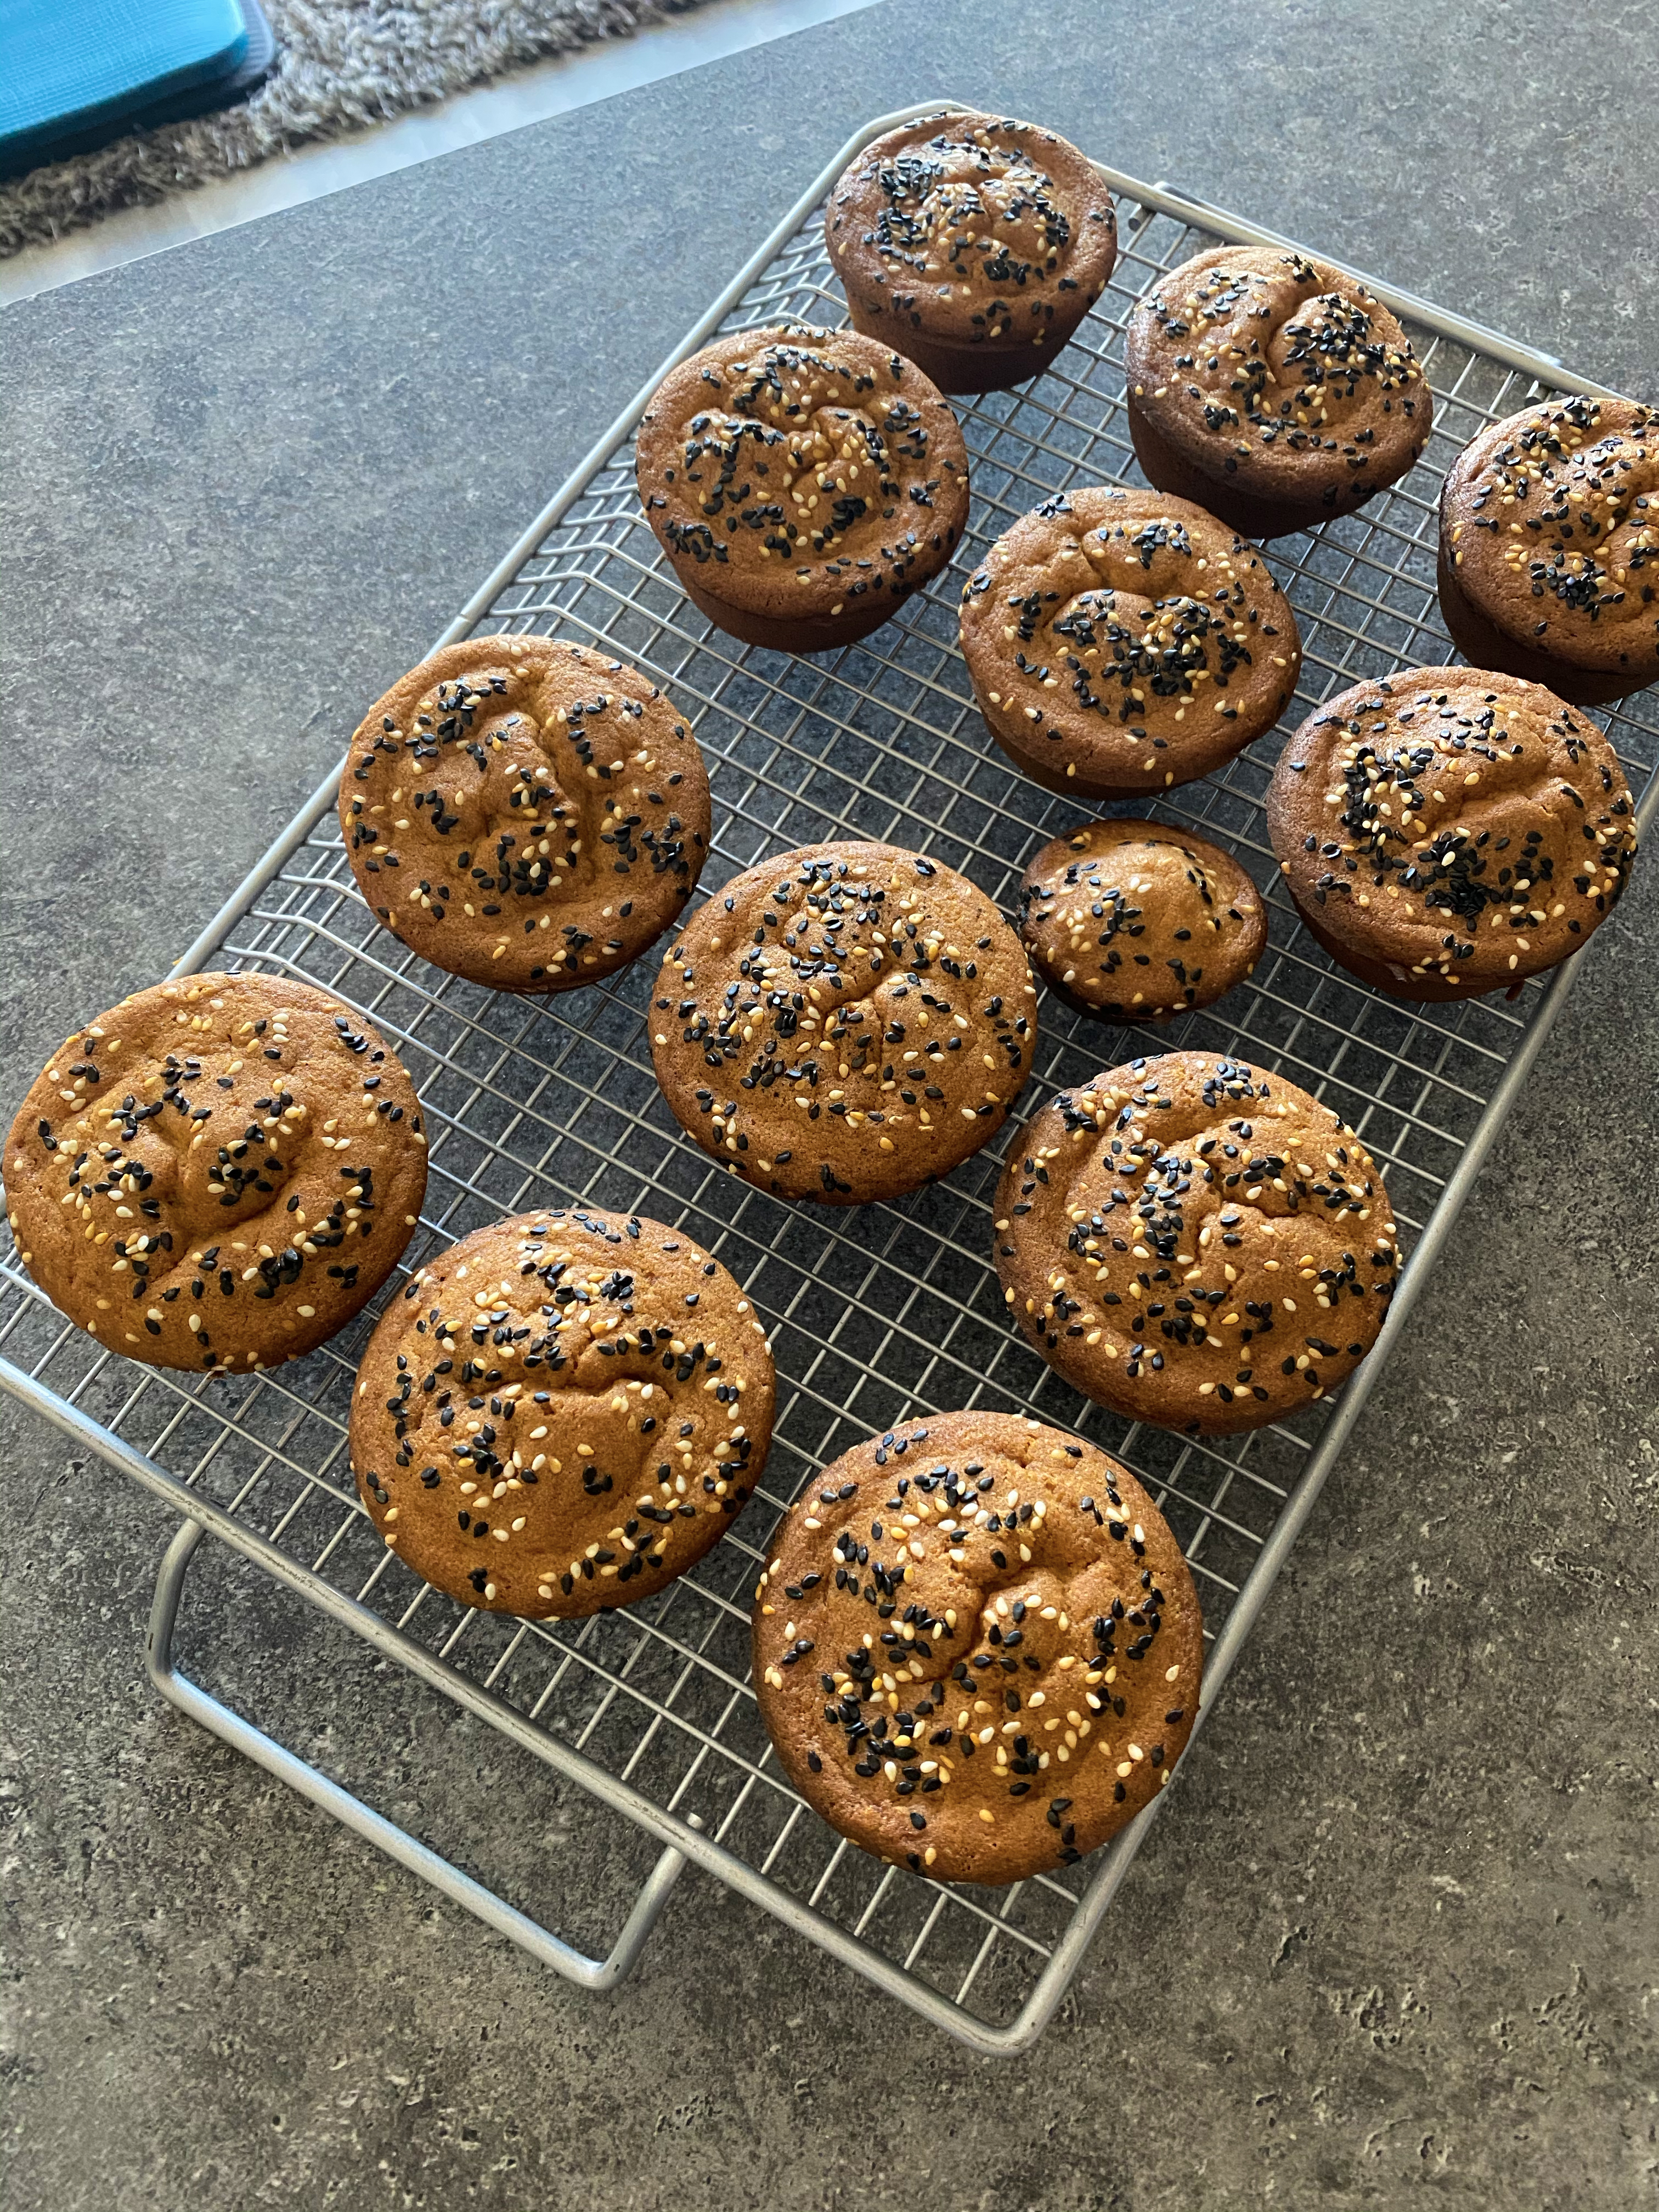
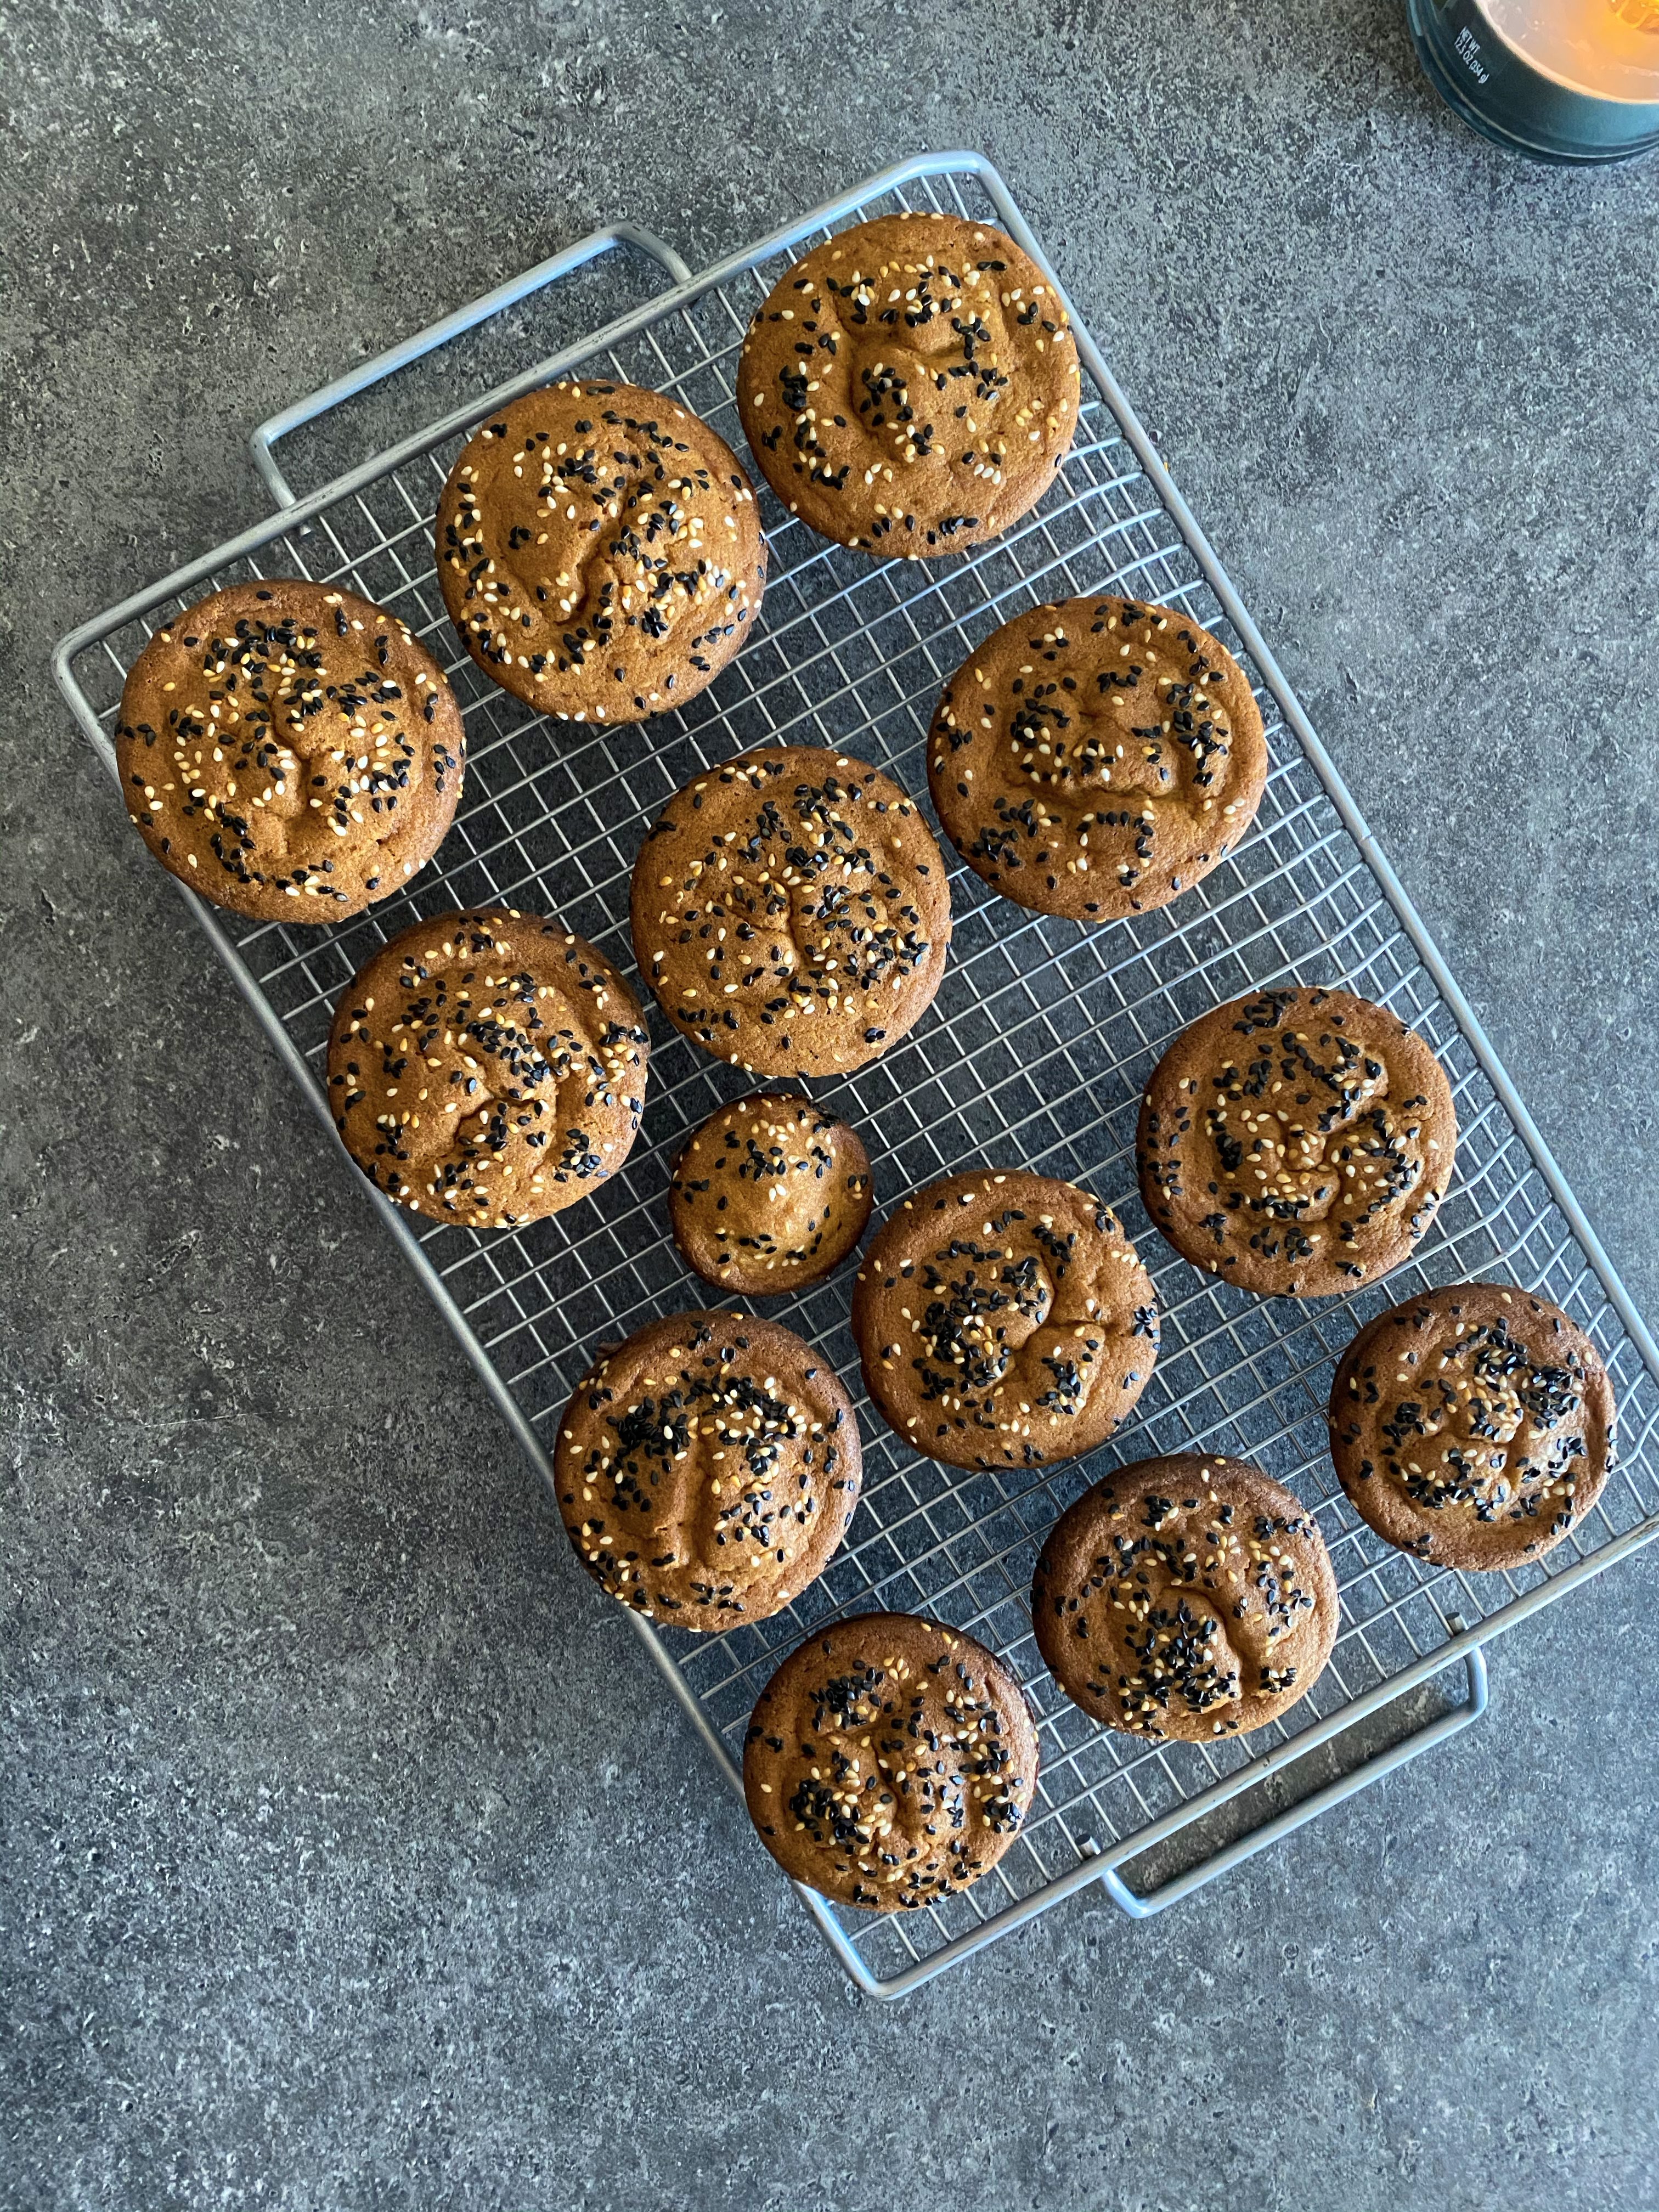
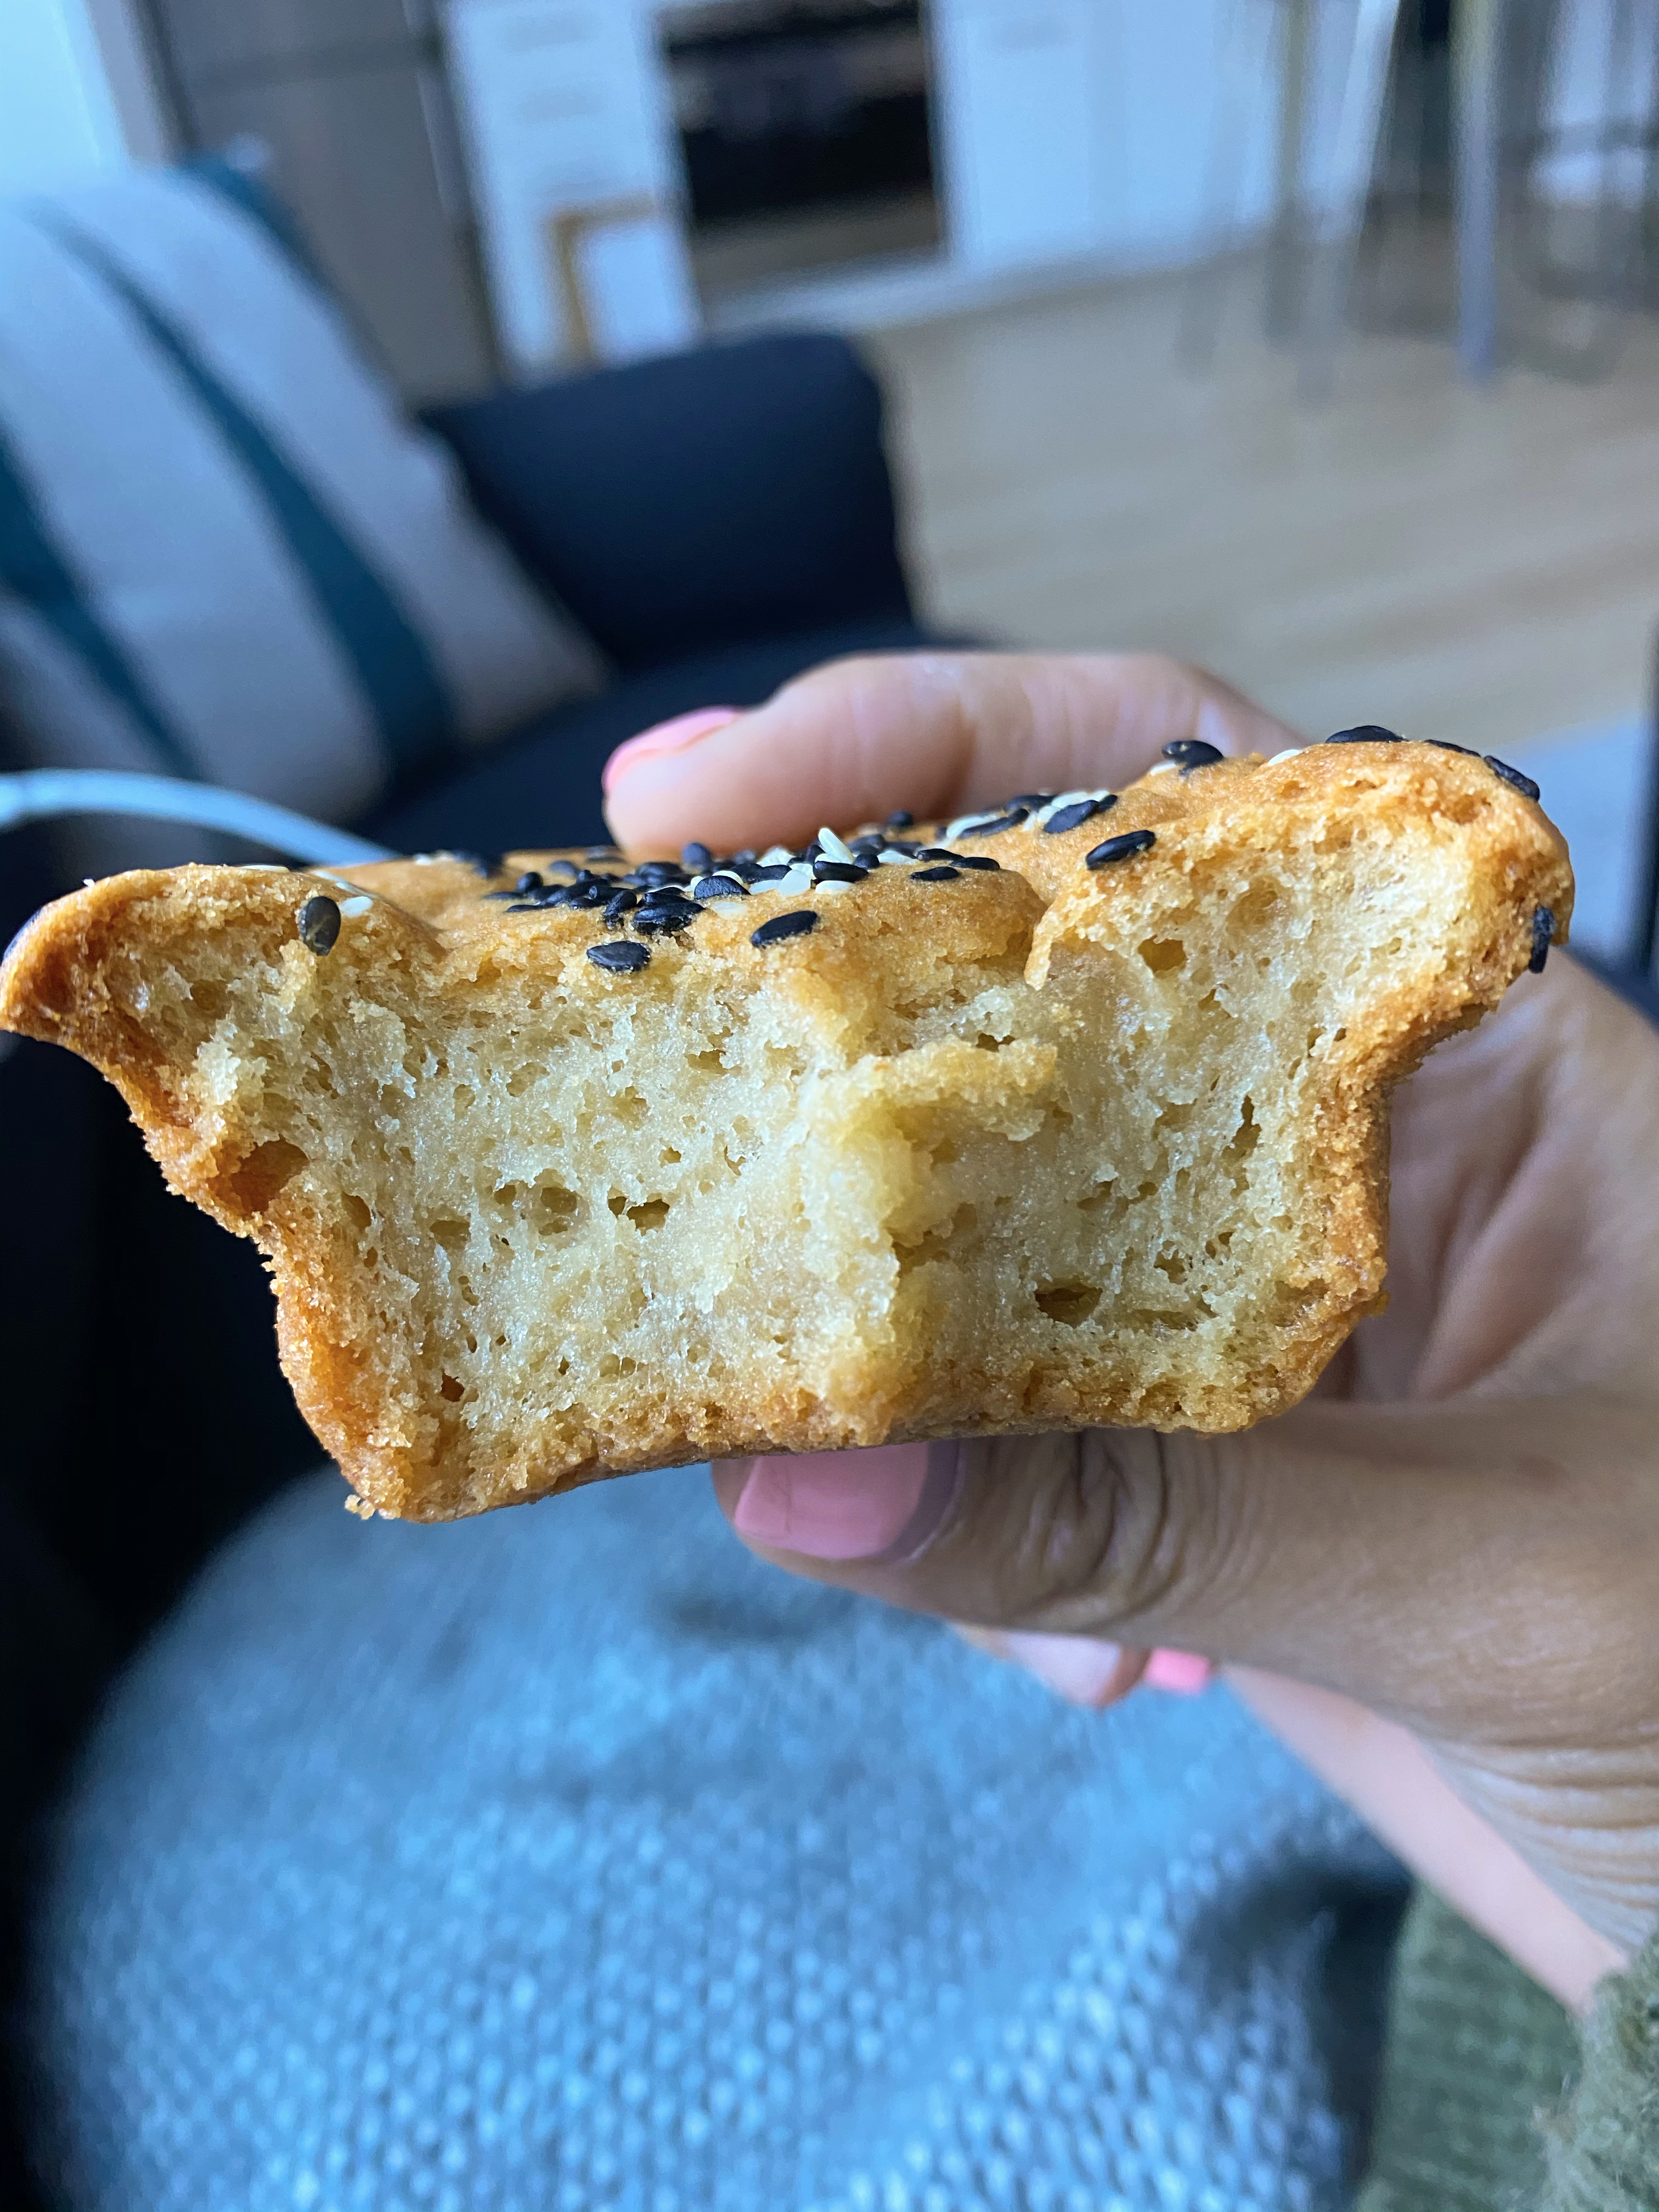
1½ tablespoons each, black and toasted sesame seeds, for garnish
Instructions:
FOR THE MUFFIN MIX:
Preheat oven to 350°F and place the oven rack in the middle of the oven
Generously grease the sides and top of a 12-cup muffin tin with non-stick spray or softened butter
In a medium bowl, hand whisk together the sweet rice flour, dark brown sugar, baking powder, and salt
In another bowl – or a stand mixer, if you have one fitted with the whisk attachment – whisk together the melted butter, coconut milk, eggs, vanilla, and molasses
With the mixer on low speed, slowly add the dry ingredients mix to the wet ingredients mix and slowly blend until completely combined not to over blend it
Divide the batter evenly in the muffin tin, filling each cup all the way to the top
Sprinkle the tops with black and white sesame seeds
Bake 55-65 minutes – until the top is brown and crispy and the cake springs back when poked with a finger
Let cool 10 minutes in the pan, then transfer to a wire rack to cool completely
Store in an airtight container for up to 4 days
Tips/Notes:
Molasses is optional but I highly recommend adding this in to elevate the flavor and get the right color
Eggs, can also be placed in a dish of warm water for 5 minutes to bring to room temperature if needed
The thickness of your batter will vary depending on the brand and thickness of your coconut milk and temperature of your butter
Coconut milk must be full-fat – anything less and the muffins don’t come out right
When using regular cane sugar instead of dark brown sugar, the muffins will come out just fine but in a lighter caramel-like tone
The muffins get softer after a few days but you can pop them into the oven for a couple minutes to get the crispiness back
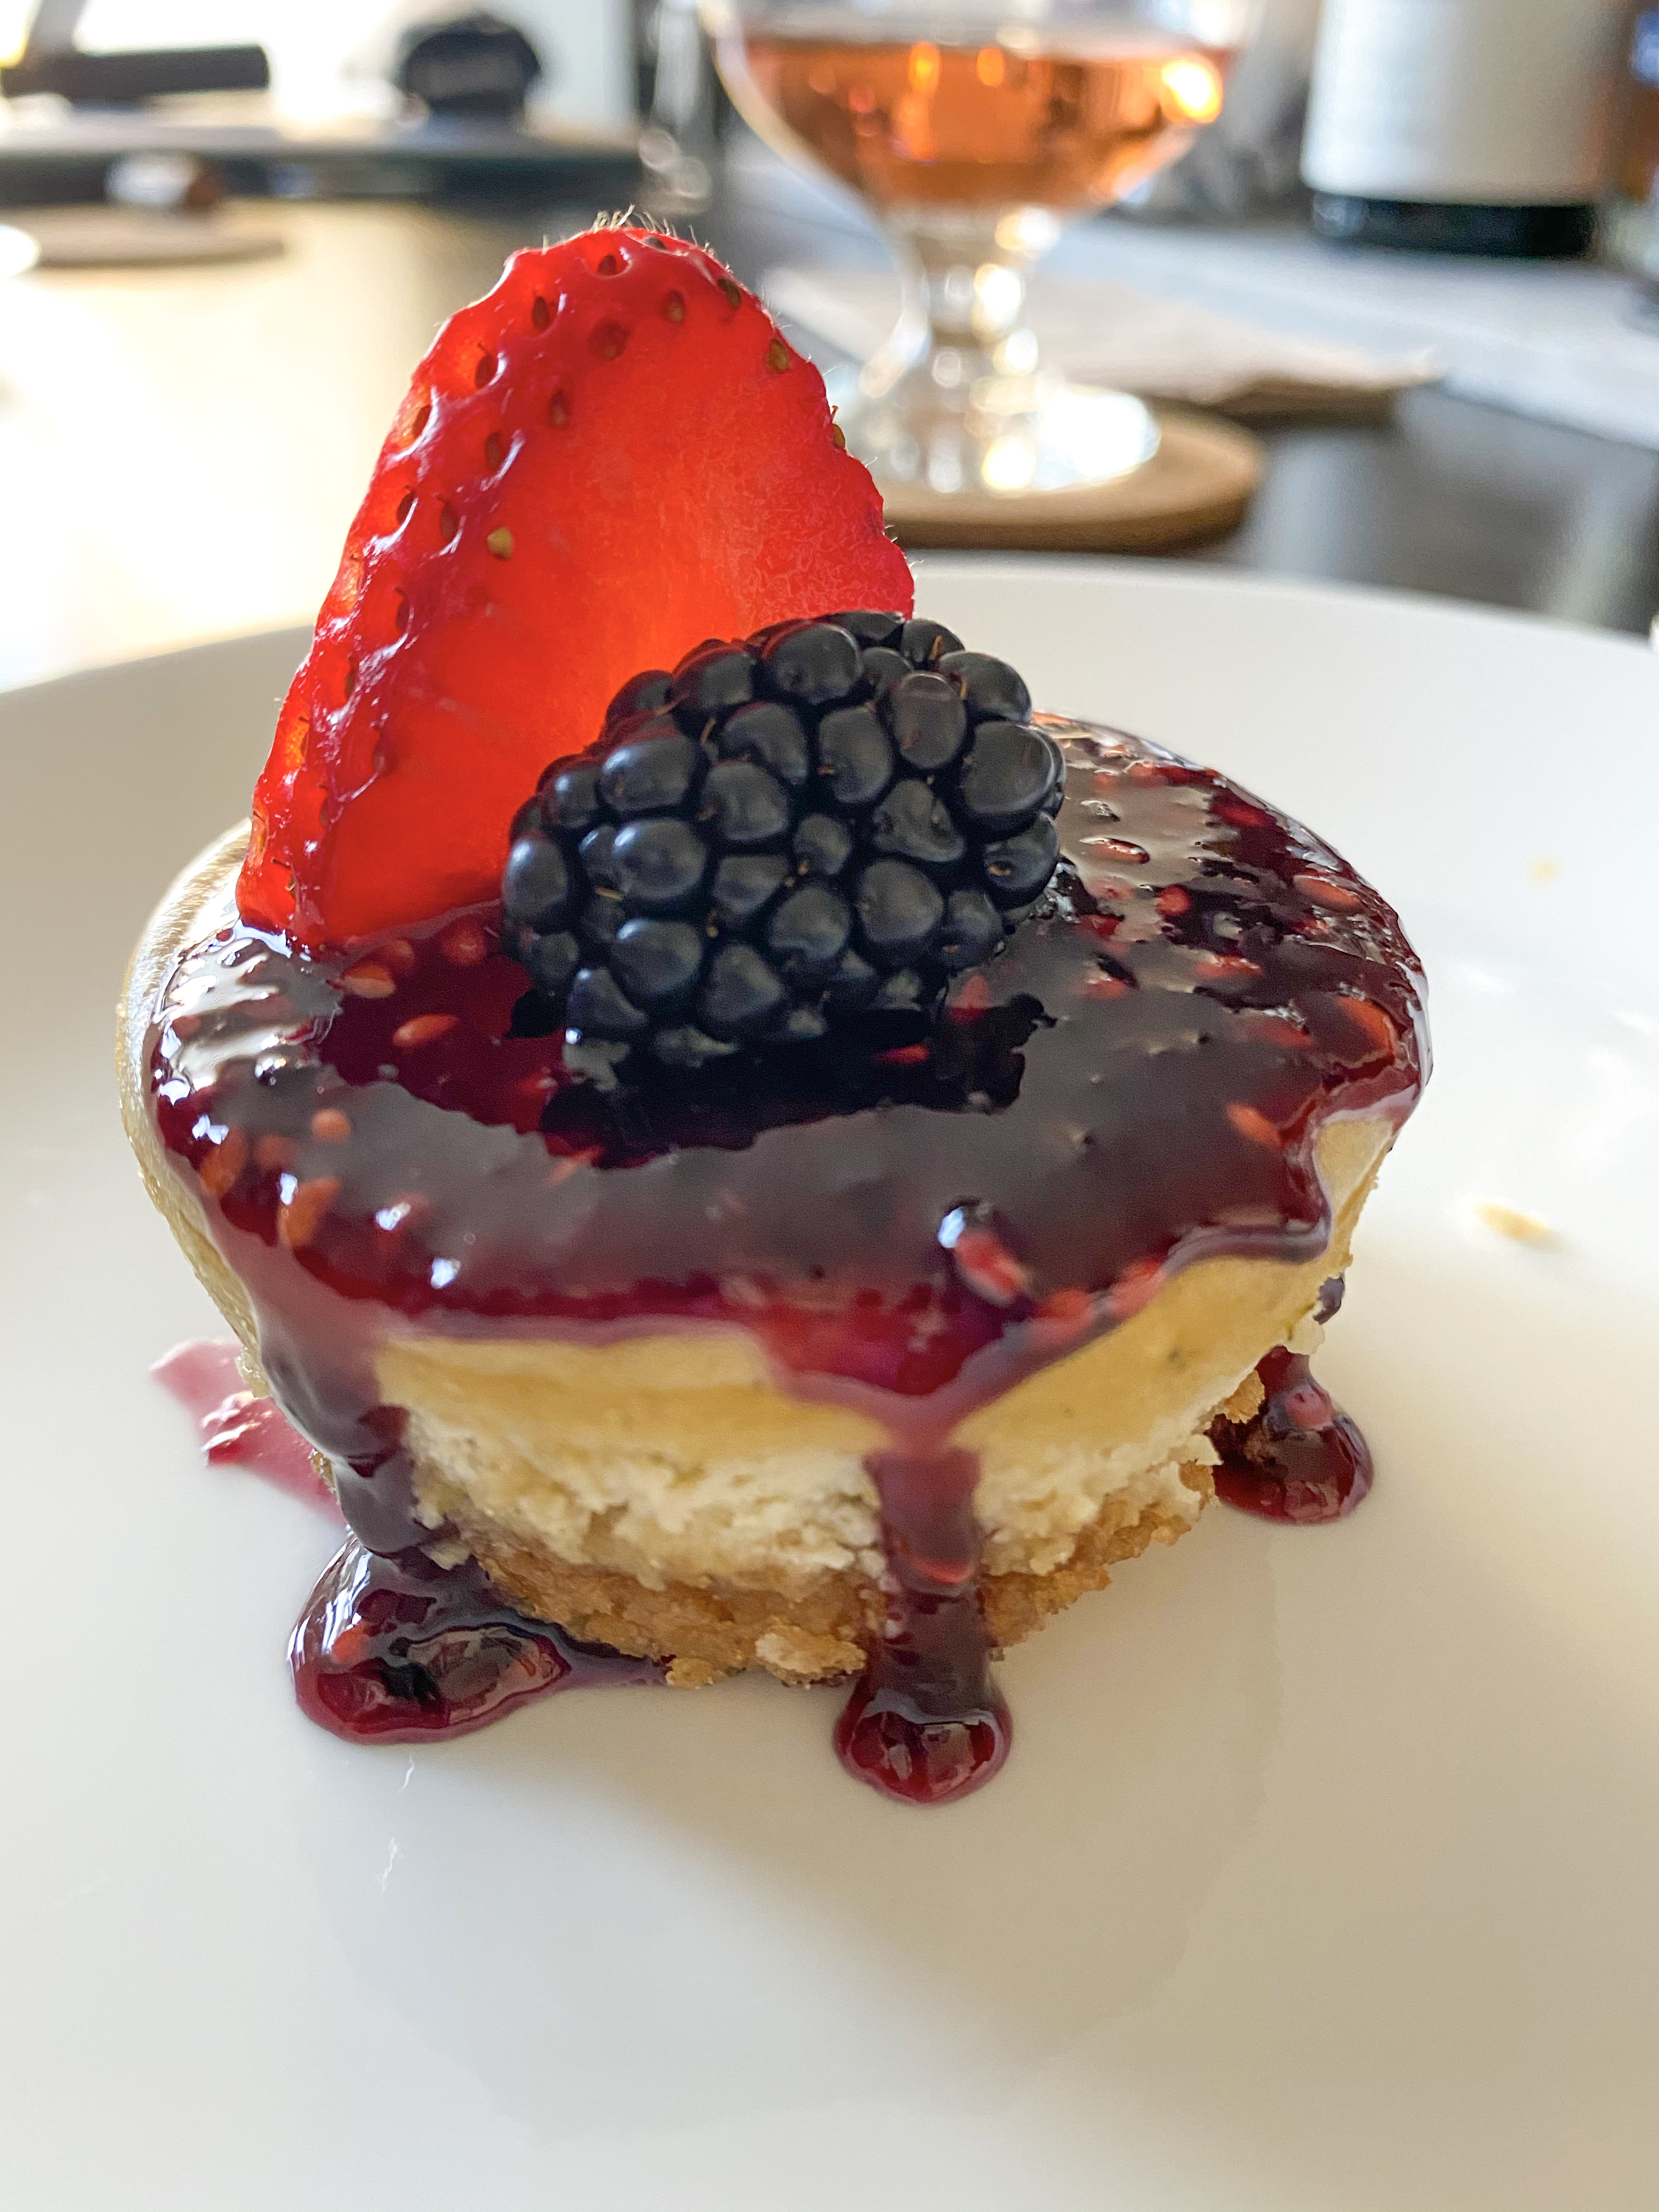
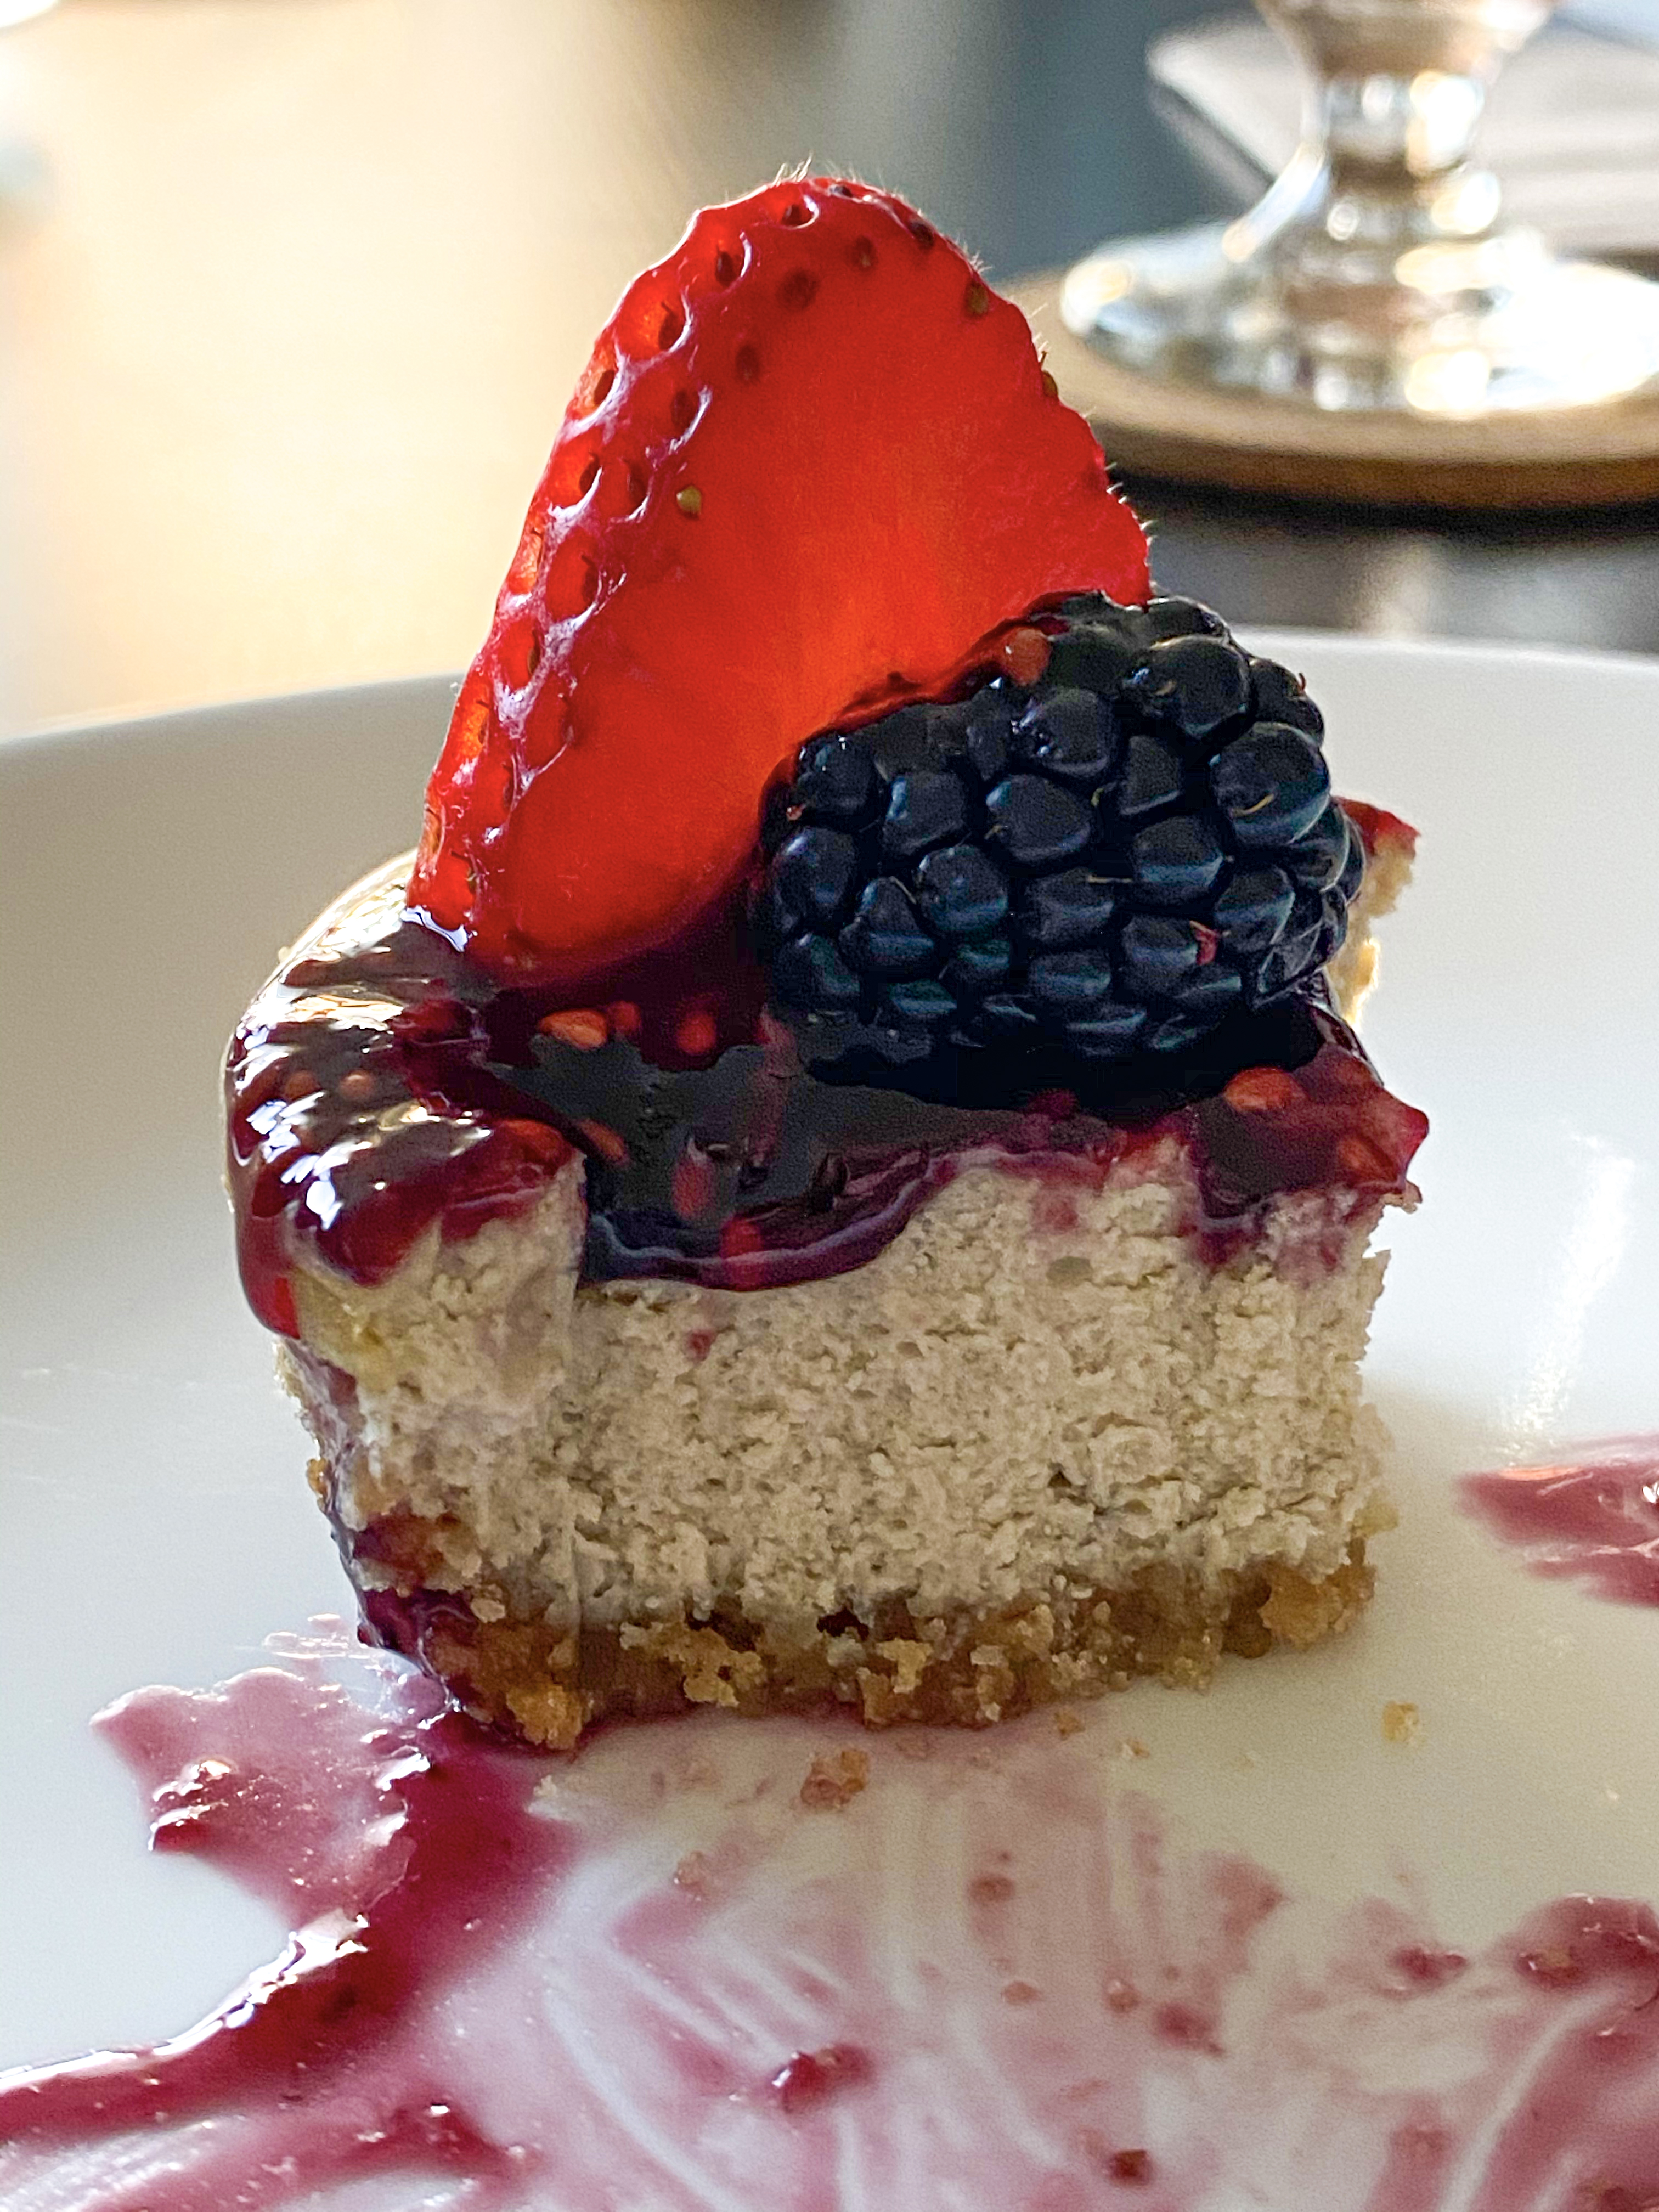
This recipe is one I plan to continue to use until I get tired of it (not sure that will happen). After a few tries, I have been able to successfully make these delicious mini lavender cheesecakes with the right amount of lavender and fluffiness!
I used Girl Scout cookies – Thin Mints – instead of graham crackers as the crust on my latest attempt – SUCH A GREAT IDEA! You have to try it!
Ingredients:
FOR THE CRUST:
1/2 box (7 oz.) graham cracker crumbs (Or a half box of favorite cookies
1/4 cup brown sugar
1 cube (4 oz) butter, melted and cooled
FOR THE LAVENDER CHEESECAKE:
2 tablespoons lavender buds, finely chopped or crushed
4 (8 oz) packages. cream cheese, room temperature
1 cup granulated sugar
1 tablespoon cornstarch
1/8 teaspoon salt
1/2 cup sour cream*
1 teaspoon vanilla extract
4 eggs, room temperature
2 egg yolks, room temperature
FOR BLACKBERRY TOPPING
6 oz (180g) blackberries, pureed and strained
5 tbsp (65g) sugar
2 1/2 tsp cornstarch
*Substitute sour cream with even parts heavy whipping cream, greek yogurt and mayo (make sure you only use 1/2 cup of mixture for use in the recipe)
Instructions:
FOR THE CRUST:
Preheat the oven to 350°F
Spray 9-inch springform pan or Silicone baking tray with non-stick spray (or butter)
Mix together the graham cracker crumbs and sugar (If you use cookies don’t add more sugar) then add in the melted butter and toss with a fork until evenly moistened (should look like damp sand)
Divide evenly into the prepared pan, press down firmly with the flat bottom of a measuring cup or the flat bottom of a cup
Transfer pan into the oven and bake the crust for 10 minutes
Remove and set on a cooling rack while preparing the blackberry topping
FOR THE BLACKBERRY TOPPING:
Add the blackberries to a food processor and puree until smooth (a little more than 1/2 cup of puree)
Mix together the blackberry puree, sugar and cornstarch in a medium saucepan
Cook over medium-low heat, stirring consistently until mixture thickens and comes to a boil (about 5 minutes)
Allow to boil for 45 seconds to 1 minute, then remove from heat
Pour into a glass container and refrigerate and allow to cool completely
FOR THE LAVENDER CHEESECAKE:
Set the crust pan to sit inside a larger, deep-sided pan such as a roasting pan. Fill the lower, larger pan with hot water that comes up to 2/3 of the top pan
MAKE SURE TO ARRANGE THE OVEN RACK TO THE LOWER-MIDDLE POSITION OF THE OVEN AND REDUCE THE OVEN HEAT TO 325°F
Place the dried lavender buds and reserve into a spice grinder and bring to a powder then set aside
In a large bowl, add the cream cheese and sugar to a mixing bowl (a stand mixer if possible) then beat on medium-low speed for 1 minute until smooth
Add the cornstarch, salt, sour cream* and vanilla. Beat on medium-low speed for another minute until creamy
Stop the motor and scrape down the sides and bottom of the bowl with a spatula
Keeping the mixer speed on medium-low, beat for another minute while adding the eggs and yolks, one at a time, mixing well between each one, not to over mix
Fold in the lavender bud powder with a spatula (add less for not so potent lavender taste)
Pour the mixture on top of the crust pan and place into oven
Bake the cheesecake for 50-55 minutes, then turn off the oven immediately and crack the door open or prop it open letting the cheesecake cool slowly for 1 hour
Then carefully take out both pans from the oven and lift the cheesecake from the water bath
Let the cheesecake cool for another 30 minutes then top with blackberry topping and serve
Tips/Notes:
Cream cheese can be quickly brought to room temperature in the microwave. Set the microwave on ‘defrost’ setting for 10 to 15 seconds
Eggs, can also be placed in a dish of warm water for 5 minutes
Blend the ingredients on slow speed as a high speed will add air into the batter which will cause the cheesecake to puff up during baking and crack during cooling
The refrigerated cold cheesecake will slice easily by dipping a sharp knife in hot water and wiping it off before each slice is made