Caramelized Ground Pork in Oyster Sauce

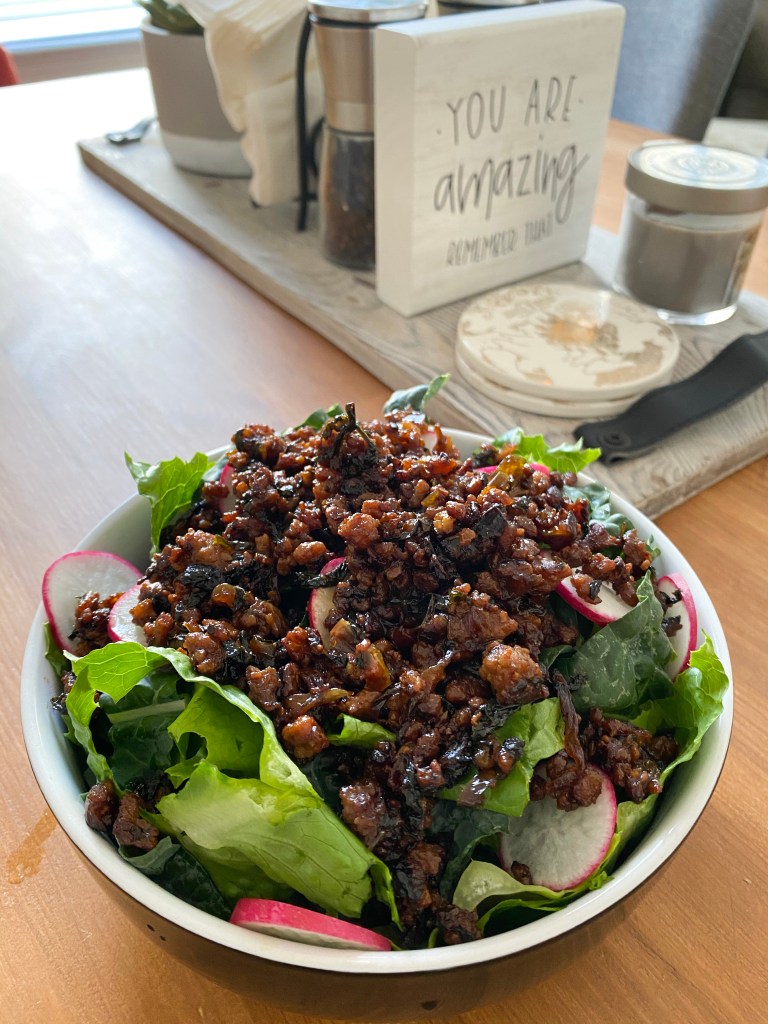
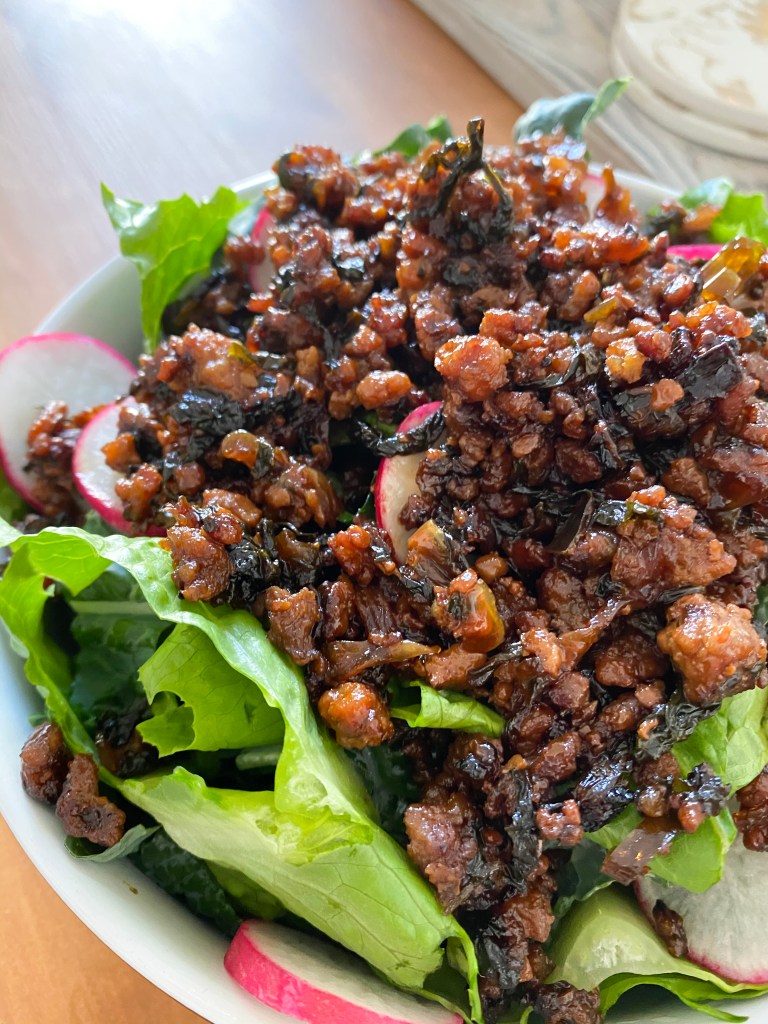
I came across a recipe that looked delicious called Vietnamese Caramelized Pork Bowls — it looked divine and I was looking for something that wasn’t time intensive. There were a few ingredients I didn’t have on hand so I switched them out and everything came out so tasty! (see the original recipe below) The sauce “caramelized” similarly the way sugar does and just as delicious!

Here’s the link to the original recipe: https://www.recipetineats.com/vietnamese-caramelised-pork-bowls/

Ingredients:

FOR THE BASE:

  • 1 1/2 tbsp toasted sesame oil
  • 2 large shallots, finely minced
  • 2 tsp ginger, minced or paste
  • 3 garlic cloves , minced or paste
  • 1 jalapeno, minced

FOR THE GROUND PORK:

  • 1 lb ground pork
  • 1 tsp white pepper
  • 2 tbsp oyster sauce + 1-2 tbsp oyster sauce (keep separate)
  • 1 tbsp shao xing wine
  • 2 teaspoons salt

Instructions:

FOR THE MAIN:

  1. Heat the oil in a large skillet or wok over medium high heat
  2. Cook the shallots, ginger, garlic, and jalapeno for about 2-3 minutes, until slightly golden brown
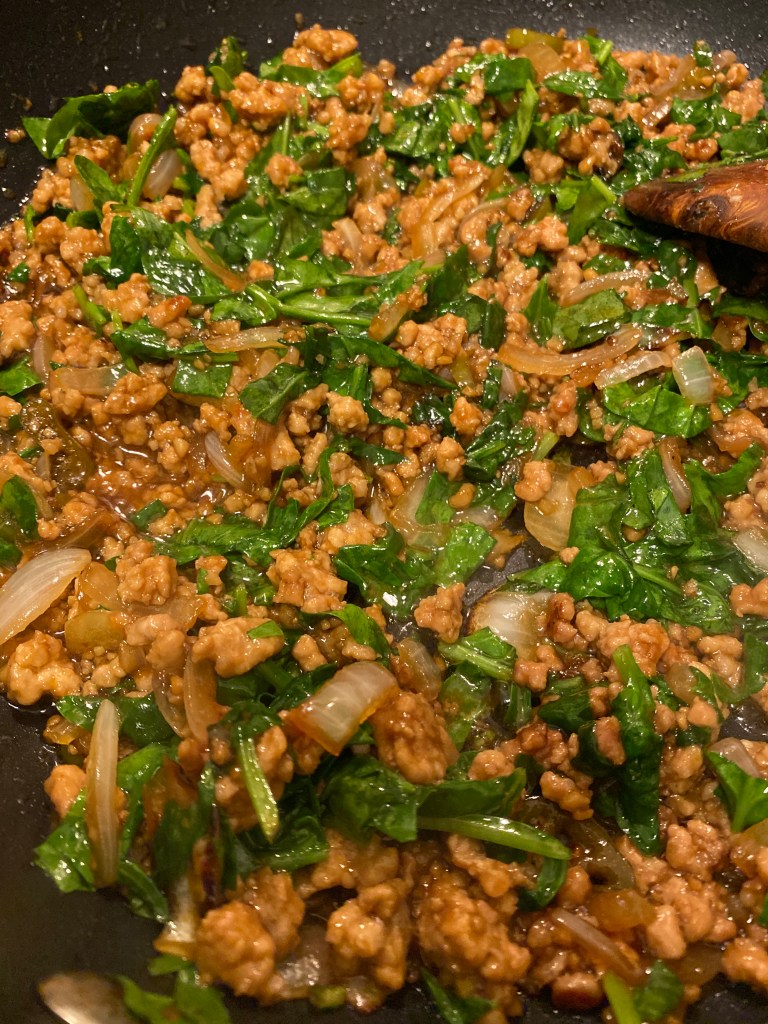
  3. Add pork into the mixture and break apart with spatula to mince it as it cooks for another 5 minutes
  4. Sprinkle in the white pepper and salt, mix well
  5. Add in oyster sauce and mix to cover everything
  6. If you don’t think there is enough sauce to cover all, add in another tablespoon or two and mix well
  7. After three minutes, add in the shao xing wine
  8. Cook mixture until “caramelized” to preferred liking (I cooked further for about fifteen minutes, mixing only once in between to prevent burning)

Tips/Notes:

  • Can freeze and keep for two weeks
  • I didn’t have any scallions but if you do, I recommend adding some in at the beginning with thee shallots and all for added flavor

Please leave your rating below:

Cast-Iron Skillet GF Individual Pizzas

I went a little button crazy when it came to buying flour during this pandemic! I have so many different types of flour in the house, than I know what to do with! One of the flours I have is called cassava flour. It’s naturally gluten free yet holds great flavor!

I browsed around at some random recipes with cassava flour to see what I could do with it and found a few posts about cast-iron skillet pizzas. This sounded perfect for a Sunday night in with the roommate and some wine! I found one recipe to follow for making the crust portion but did my own toppings.

Here’s the link to the original recipe: https://thedomesticman.com/2015/08/11/ottos-cassava-flour-pizza-crust/

Ingredients:

FOR THE CRUST:

  • 1/2 cup cassava flour
  • 1/2 cup arrowroot flour
  • 1/4 cup heavy cream
  • 1/4 cup water
  • 2 tbsp butter
  • 1/2 tsp salt
  • 1 large egg, beaten
  • 3/4 cup grated sharp cheddar
  • 1/4 tsp white pepper
  • 1/4 tsp dried oregano
  • 1 tsp onion powder
  • 1 tsp garlic powder

FOR THE TOPPINGS:

  • Pizza sauce or Pasta sauce of choice (I used a pasta sauce I had purchased from Trader Joe’s and it was delicious)
  • Mozzarella cheese
  • Pepperoni
  • Black olives
  • Corn
  • Bell Peppers (Red or Green)
  • Chicken (I had leftover cajun spiced chicken and diced it up to sprinkled onto the a pizza)

Instructions:

FOR THE MAIN:

  1. Preheat your oven to 450°F
  2. Combine the flours in a large mixing bowl and set aside.
  3. In a saucepan, combine the heavy cream, water, butter, and salt and warm over medium-low heat. Once the butter melts and the liquid just starts to bubble, remove from the heat
  4. Stir the cream mixture into the flour mixture and let cool for 5 minutes
  5. Add in the beaten egg and then knead together with your hands
  6. Add the sharp cheddar, white pepper, garlic powder, onion powder and oregano to the flour mixture and continue to knead together until it’s dough-like
  7. If it gets too sticky to work with, dust it with some more arrowroot flour or water, little by little if too dry (makes enough for two small pizzas)
  8. Split the dough in half, then stretch out each half into the thinnest disc possible without tearing (use a rolling pin if you have one)
  9. Put one half in an 8- to 10-inch cast-iron skillet, spreading the dough to the edges of the skillet with your fingers
  10. With a fork, poke some holes in the dough to let air pass through
  11. Bake in the center of the oven for 6 minutes, then take it out and put it on the stovetop to cool for 1 minute (it gives the dough time to cook through without burning the toppings)
  12. Add pizza or pasta sauce, cheese, and all toppings as desired
  13. The put the pizza back in the oven and bake for another 15 minutes or until the cheese starts to brown
  14. For extra-crispy toppings, leave in for another minute or two
  15. Repeat the process with the other half of the dough and then enjoy!

Tips/Notes:

  • Best to eat when fresh, not the next day
  • I layered one of the pizzas with twice the toppings and baked them for an additional five minutes – not a bad choice!

Kidney Bean and Beef Chili

I have a small, slightly funny story to tell you about a can of kidney beans I bought. I needed them for a recipe and when the pandemic struck I had done most of my ordering online through Instacart. I saw a can for a great price and added it to my cart. I received my order and the can of kidney beans had me in shock. The can was the size of a human head, maybe even slightly larger depending on the head! I was baffled! My roommate couldn’t stop laughing!

So now I had this massive can of kidney beans and I needed to make something with it. I could have made rajma which is an Indian kidney bean recipe and a delicious one, but I decided to go with chili since I had been craving it. I usually do a turkey chili but I decided to go the original route for this one with some tweaks of my own! This came out so well, I had to share!

Here’s the link to the original recipe: https://www.rachaelraymag.com/recipe/beef-and-kidney-bean-chili

Ingredients:

FOR THE HEART OF THE CHILI:

  • 2 tablespoons olive oil
  • 1 1/4 lb ground beef
  • 1 onion (white or yellow) diced
  • 4 cloves garlic chopped
  • 1-3 cans of kidney beans (whatever you desire)
  • 1 red bell pepper diced
  • 1 jalapeno diced
  • 1 can diced tomatoes (or two large tomatoes diced)
  • Handful of parsley chopped
  • 2 1/2 cups beef stock

FOR THE SEASONINGS:

  • 1 tablespoon ground pepper
  • 1 tablespoon salt + 1 tablespoon vintage merlot sea salt (or as desired for seasoning)
  • 2 tablespoon ground cumin
  • 3 teaspoon ground coriander
  • 1 1/2 tablespoon smoked paprika
  • 2 tablespoons ancho chili powder (I didn’t have an actual chili mixture)
  • 1/2 teaspoon dried oregano

Instructions:

FOR THE PREP:

  1. Chop all your ingredients as listed to keep them ready for tossing into the pot

FOR THE MAIN DISH:

  1. In a large Dutch oven (I have a 6 quart pot), heat olive oil over medium-high and add chopped onions and garlic. Cook, stirring often, until they have softened, about 5 minutes.
  2. Toss in the ground beef and season with salt and pepper.
  3. Stir often and break up ground beef with a spoon if needed, until browned and cooked through, about 5 minutes.
  4. Toss in ground cumin, ground coriander, oregano and smoked paprika and stir until aromatic, about 2 minutes.
  5. Add in the jalapeno and further season if needed. Stirring often, adding a teaspoon or two of oil if they start sticking, until softened, about 5 minutes. Add the ancho chili powder and diced tomatoes here, mix well.
  6. Pour in the beef stock and reduce heat to medium, stirring often, until slightly reduced, about 15 minutes.
  7. Add in 1 to 3 cans kidney beans. Cook, stirring often, until flavors meld, about 15-20 minutes.

Tips/Notes:

  • I generally like to make chili a day before because the flavors seeps in real nicely and you’re left with a flavorful bite every time! Not to say the chili now isn’t tasty but even better the next day!
  • I switched the poblano peppers for jalapenos as that was all I had. I know the flavor will change a little bit with a different pepper. Be sure to pick one that works for you!

Please leave your rating below: